Hello, hello! It's been one busy week for me. How about you? We got a name suggestion for the ladybug. Hannah from Indianapolis, Indiana, suggested Ms Lady Flower. That's a cute name, Hannah. Anyone else got any ideas? If you can't remember what the ladybug looks like, go to http://grammcrackers.blogspot.com/2012/02/new-friend.html and check her out. She really needs a name, so let's have some more suggestions!
We are working on our garden. I planted from seed this year, for the first time, and it's so exciting! The cucumbers are growing so fast you can almost see them grow!
This is after just 5 days! It's like we have a little cucumber forest. And the little tiny plants next to them are tomatoes, and they are coming up pretty good, now, too. The peppers haven't peeked out yet, but the gourds are coming up. So much fun!
Speaking of ladybugs, I finally got the other coaster project finished, and it's a ladybug dominoes game! The coasters I used for this game are rectangular, and so they were perfect for dominoes.
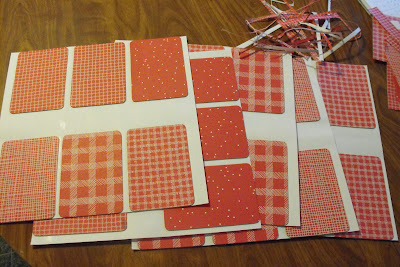
I started by choosing some different papers that all coordinate well, and glued the coasters to them and cut them out.
Then I chose some more coordinating papers, and glued the other side. For more complete instructions on how to do this, go to http://grammcrackers.blogspot.com/2012/03/memory-game-and-my-first-giveaway.html . I chose red with white for the backs of the cards and white with red for the fronts. The one that looks pink is actually really light red with cloud-y white on it.
Then I cut them all out, sanded the edges and got them ready to finish. I chose a little ladybug stamp I had and used black paint to stamp it with. I brushed a very light coat on the stamp so I wouldn't get too much paint on it. Some turned out darker than others, but that's the beauty of handmade, right? No two things the same.
I also had a cute little squiggly-line stamp that I used for the dividing lines. After the black paint was dry, I used a permanent red marker to color the ladybugs.
Then, I had to decide what to do with the other side of the dominoes. I tried to think of another game I could put on that side, but again, my grands are really good at memorizing, so I knew that either the number of bugs or the colors would give away what was on the other side, so I just decorated it instead. I got a little block of wood and some sticky-back fun foam, and made a big stamp to match the little one. I stamped the little stamp on plain white paper and enlarged it to the size I wanted on my copier. Then I traced it onto the paper backing of the fun foam and cut it out. I made two layers so it would be thick enough not to get marks from the block when I stamp it. It was kind of tricky cutting those dots, but I got it.
You can see the two layers. I used more black paint and stamped this on the backs of the dominoes, let it dry, and used the red marker again to color them.
And they turned out so cute!
Because I used paint and permanent marker, they don't have to be coated with anything, but I want them to be wipe-able, so I will be putting a coat of water-base varnish or decoupage medium on them.
So there's our new project! I know that most of you won't have beer coasters hanging around, but you can use chipboard from the backs of writing tablets, drawing tablets, etc. These will not be too hard to cut, because they have all straight sides. And they don't have to have rounded corners. Make some today! You will have fun making them and playing with them. Let the kids help, too.


No comments:
Post a Comment
We love comments! Crackers and I really want know what you think.